
In a Studio Far, Far Away:Building the Imperial Probe Droid

The Imperial Probe Droid gets very little screen time, but it's one of the first things we see in Star Wars: The Empire Strikes Back, and it sets the tone for everything that follows: a cold, patient Imperial hunter sent out alone to find the Rebels.

I've been building a studio-scale version, with every part 3D printed, a screen-accurate exterior, and all the electronics hidden inside. The goal is a droid that looks like it just landed on Hoth, complete with a motorized head, lighting and sound.
I've been sharing progress photos on the Tremor Studios Instagram page, but this is the first time I'm telling the story in one place.
The Build So Far
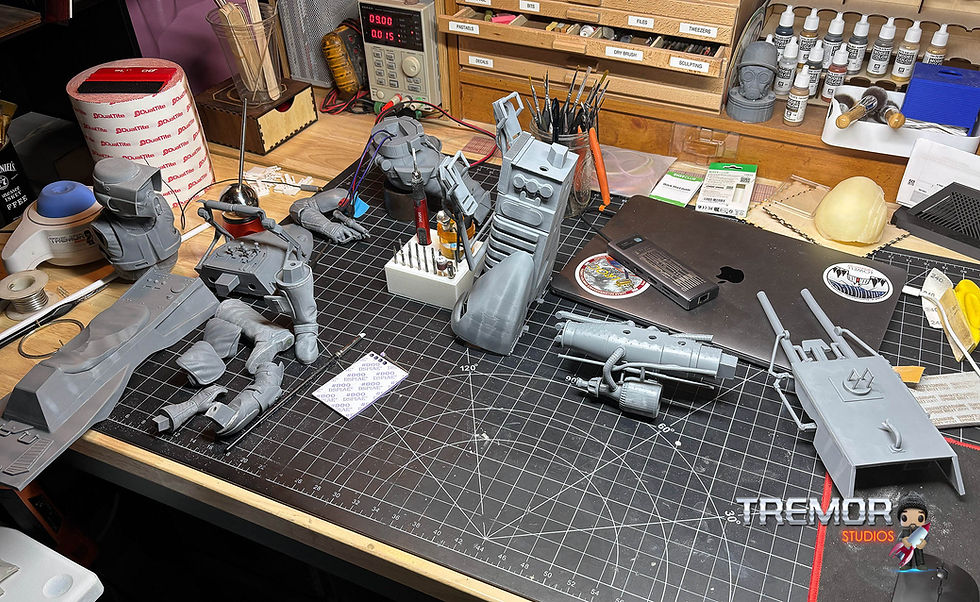
The main 3D print files come from the Imperial Probe Droid model at Gambody, and I printed it at 1:4 scale. I printed, finished and primed the torus-shaped head, the main body with its sensor apertures and the neck assembly first. Next came the grasping extenders (the droid's legs, or manipulator arms).


According to Star Wars: The Essential Guide to Droids, that's their proper name. The hydraulic cylinders are scratch-built from telescoping brass tube, and I designed and printed the fork mounts and pins where each cylinder meets an arm joint.
The main body has a lot of greeblies, the small mechanical details that make the droid look the way it does. Once everything was attached, I primed it and stood the droid up on a temporary stand for the first time.
Head Movement
The head is motorized, and I wanted its movement to match the film. A NEMA 17 stepper motor drives the head through a custom 3D-printed drive disk, and the head rides on a shoulder-and-lip interface in the neck. I've been testing the motion with an Arduino and a stepper driver on a bench power supply.


The sequence I've been testing is based on the probe droid's scene on Hoth. When power comes on, the droid pauses for a moment, then makes a slow, deliberate 30-degree clockwise scan.
After a short pause, it does a second slow clockwise scan. The head movement is still under consideration, and I haven't decided on the final sketch for the program that controls the motor.
Paint
I used the ArchiveX acrylic set made for the Imperial Probe Droid. The scheme is simple: Lark Dark Grey as the base coat, Scarlet and Engine Black for the panel colors, and Roof Brown and Rust as thin weathering coats.


I worked in that order, from opaque base to opaque panels to translucent weathering, masking the panel areas before painting them. Most of the color work happened over Labor Day weekend, after work travel kept me out of the studio for a while.
After the color was down, I applied a clear coat, then a black oil paint wash to bring out the panel lines and add early weathering. I painted the grasping extenders and the body the same way.
The Color Question
Screen stills from the film did little to help me pin down the droid's true colors. On Hoth, against bright snow and in dim lighting, the droid appears almost black.
Many builders paint theirs black for that reason, but most of the reference material I found, including official merchandise and game models, points to a dark gunmetal or olive-tinged gray instead.


ArchiveX says its colors are based on the original model builders' palettes, which is why I followed their scheme.
I'm honestly not sure I've nailed the exact movie colors. I do like how it's turning out, and I'd rather have a droid with readable detail than one that disappears into black.
Sensor Lenses
Every sensor opening on the head now has a lens. I used a mix of different-sized cabochons and clear fillable ornaments, all airbrushed from the back so the color sits behind the glossy surface.


That gives the lenses depth and protects the paint from handling. The ribbed barrel has a glass lens, and a couple of the sensors have a second clear ornament over the lens as a protective outer layer.
What's Next
The next step is the electronics. Because the head rotates, power has to get from the body into the head without wires twisting up and snapping. That's the job of a slip ring, and I designed a custom PCB to act as one between the head and body.

The audio, control boards and main power will all live in the base, with just two wires passing through the slip ring to power the LEDs in the head.
The PCB and the LEDs are on order. From my references, the droid has one main white light, so the lighting will stay screen-accurate. After that comes the base.
Comments